Understanding the Gas Pipeline Installation Process
As more homeowners turn to natural gas for its efficiency and cost-effectiveness, understanding the gas pipeline installation process is essential. Whether you’re considering a new gas pipeline installation or upgrading an existing system, knowing what to expect can help ensure a smooth and safe experience. This comprehensive guide will walk you through each step of the process, from initial assessment to final commissioning.
11/9/20244 min read
1. Introduction to Gas Pipeline Installation
Gas pipeline installation is the process of safely setting up a network of pipes to transport natural gas from the main supply to your home’s appliances, such as stoves, water heaters, and heating systems. Professional installation is crucial to ensure safety, compliance with regulations, and optimal performance.
Why Homeowners Are Switching to Gas Pipelines
Cost Savings: Natural gas is often more affordable than electricity, leading to significant savings on energy bills.
Energy Efficiency: Gas appliances typically operate more efficiently, providing quicker heating and cooking.
Environmental Benefits: Natural gas burns cleaner than other fossil fuels, reducing your carbon footprint.
2. Initial Assessment and Planning
The installation process begins with a thorough assessment of your home’s needs and the feasibility of installing a gas pipeline.
Site Inspection and Feasibility Check
A certified technician will visit your property to assess the layout, existing utilities, and potential challenges.
This assessment ensures that the installation can be carried out safely and efficiently.
Understanding Local Regulations and Permits
Gas pipeline installations must comply with local building codes and safety regulations.
The installation company will handle the necessary permits, ensuring compliance with all legal requirements.
Customizing the Installation Plan for Your Home
The installation team will create a customized plan based on your home’s layout and gas usage requirements.
This plan includes choosing the optimal pipeline route to minimize disruption.
3. Choosing the Right Materials and Equipment
Selecting the right materials is crucial for the safety and durability of your gas pipeline system.
Types of Gas Pipes: Copper, Steel, and Polyethylene
Copper: Known for its durability and resistance to corrosion, suitable for indoor installations.
Steel: Strong and heat-resistant, ideal for high-pressure applications.
Polyethylene (PE): Flexible and corrosion-resistant, often used for underground pipelines.
Selecting the Best Fittings for Safety and Durability
High-quality fittings and connectors are essential to prevent leaks.
Professional installers will ensure all components meet industry safety standards.
4. The Installation Process: Step-by-Step Guide
Here’s a breakdown of what happens during the installation:
Step 1: Marking the Pipeline Route
The team will mark the designated areas where the pipeline will be laid, avoiding existing utilities.
This step ensures a clear pathway for trenching and reduces the risk of damaging underground cables or pipes.
Step 2: Trenching and Preparing the Area
Technicians will dig trenches (if needed) for underground pipelines, following safety guidelines to avoid property damage.
For indoor installations, wall channels may be created to conceal the pipes.
Step 3: Laying the Gas Pipes and Fittings
Pipes are laid and secured along the planned route, ensuring a tight and leak-proof connection.
Installers will use clamps and brackets to secure the pipeline, especially in high-traffic areas.
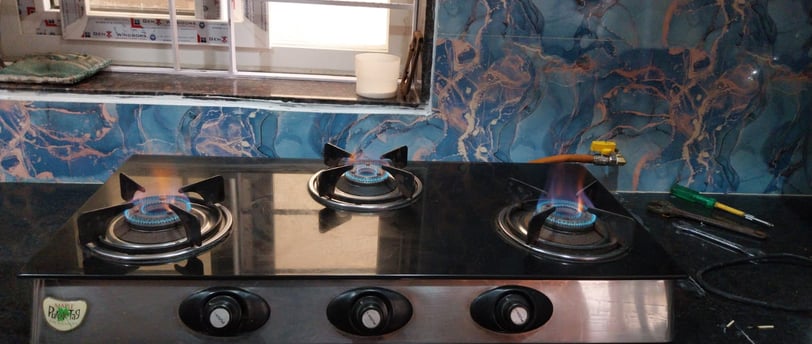
Step 4: Connecting the Gas Pipeline to Appliances
The pipeline is connected to your gas appliances, such as stoves, water heaters, or furnaces.
Each connection is sealed and tested for leaks to ensure safe operation.
Step 5: Sealing and Insulating the Pipes
Once the pipeline is in place, it is sealed and insulated to protect against damage and heat loss.
Insulation helps maintain the efficiency of the gas system, especially for outdoor or exposed pipes.
5. Safety Checks and Pressure Testing
Safety is the top priority in any gas pipeline installation.
Why Pressure Testing is Crucial
The system is subjected to pressure testing to detect any leaks or weak points in the pipeline.
This process ensures the integrity of the installation before gas is introduced into the system.
Detecting Leaks and Ensuring System Integrity
Technicians use specialized equipment to detect even the smallest leaks.
Any issues found during testing are promptly addressed to prevent future problems.
6. Final Steps: Commissioning and User Training
Once the installation is complete, the system is ready to be commissioned.
Activating the Gas Pipeline System
The gas supply is turned on, and the entire system is checked one last time for safety.
Technicians will adjust appliance settings for optimal performance.
Educating Homeowners on Safe Usage
The installation team will provide you with safety tips and guidelines for using your new gas system.
You’ll learn how to identify potential issues, such as gas odors or malfunctioning appliances.
Emergency Protocols and Safety Tips
Knowing what to do in case of a gas leak is vital for your safety.
Installers may recommend additional safety measures, such as installing a gas leak detector.
7. Common Challenges and How Professionals Overcome Them
Gas pipeline installation can come with challenges, but experienced professionals have the expertise to handle them.
Dealing with Complex Home Layouts
Older homes or complex floor plans may require creative solutions for routing pipelines.
Professional installers will ensure that the system is both efficient and aesthetically pleasing.
Handling Unexpected Issues during Installation
Unexpected obstacles, such as hidden electrical wiring or structural issues, can arise.
Installers are trained to adapt and find solutions that minimize disruptions.
8. Post-Installation Maintenance Tips
Regular maintenance is key to ensuring the longevity of your gas pipeline system.
Scheduling Regular Inspections
Annual inspections by a certified technician can prevent potential problems before they become costly repairs.
Regular checks ensure that your system remains efficient and safe.
How to Spot Early Signs of Wear and Tear
Look out for unusual gas odors, decreased appliance performance, or visible damage to exposed pipes.
Early detection can save you from expensive repairs and potential safety hazards.
Best Practices for Longevity of Your Gas Pipeline
Keep the area around gas pipelines clear and avoid stacking heavy items on exposed pipes.
Regularly test gas detectors and replace them as recommended by the manufacturer.
9. Conclusion: The Long-Term Benefits of a Properly Installed Gas Pipeline
Investing in a professionally installed gas pipeline system offers numerous long-term benefits:
Enhanced Safety and Reliability: Proper installation reduces the risk of leaks and accidents.
Lower Energy Bills: Natural gas is an efficient energy source that can save you money in the long run.
Increased Home Value: A modern gas pipeline system can boost the resale value of your property.
With the right installation team, you can enjoy a safe, efficient, and cost-effective gas supply for years to come.
By understanding the gas pipeline installation process, you can make informed decisions and enjoy the full benefits of a reliable and safe gas system in your home. Ready to make the switch? Contact a trusted gas pipeline installation service today to get started!
Contact US Today:
Email: info@vaultgaspipeline.site
Phone:
+91 8522 09 2525
+91 95155 92020
Quick Links:
Services
Our Process
Why Choose us
Contact us
Our Services:
Gas Pipeline Installation
Gas Pipeline Maintenance